


Tongue placement, specifically the combination of height, front-to-back position, lateral bracing, and blade or tip contact, is the single most important articulatory factor determining vowel quality and consonant identity in American English. Say “beat” /biːt/ and then “calm” /kɑːm/ back to back. Feel how your tongue arches high and forward for the first word, then drops low and pulls back for the second. That one sensation captures the entire vowel system in miniature. The IPA vowel chart maps every English vowel to exactly those two dimensions, and InPronunci trains your speech organs in those positions until they become accurate, feelable, and repeatable.
Traditional pronunciation teaching explains tongue placement with hand gestures and static mouth pictures. These methods are no longer effective enough: they cannot reveal full articulation details, so students take longer to develop each sound, and the result is often an approximation instead of an exact copy of the American English sound. 2D Sound Motion Technology solves this articulation problem. Its Interactive Visual 2D Sound Simulators guide students through each sound and train the speech organs, including the tongue, lips, jaw, teeth, airflow, and voice, until students develop American-like sounds. InPronunci then trains those sounds through a structured American accent training course with the AI Accent Coach.

Student Before & After
“In my opinion, InPronunci is the best app for American accent training because it works exactly like Prof. Alex conducts his classes. It gives clear guidance, structured practice, and focused pronunciation training.”
Abishek · Tamil speaker
Before
After
How does tongue placement shape English sounds?
The tongue is not one muscle doing one job. It is a highly mobile articulator capable of dozens of distinct coordinated movements, and every English sound depends on a specific configuration of its parts. Imprecise placement is the most common cause of lisps, muffled vowels, and non-native consonant quality. Understanding the geography of your tongue is the first step toward fixing those problems deliberately rather than by guesswork.
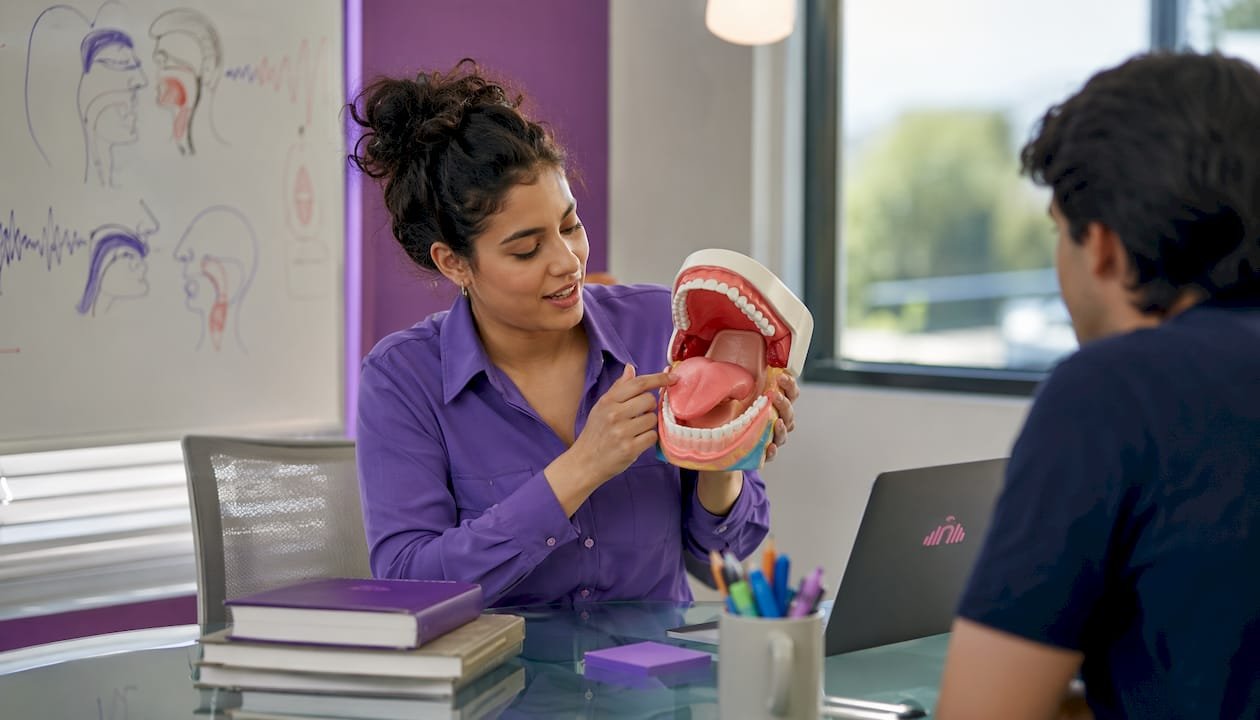
This is exactly where traditional instruction falls short. A coach can demonstrate the tongue with a hand or point to a still mouth picture, but the tongue moves inside the mouth, and neither a hand nor a picture captures its movement, timing, and contact. Students end up guessing, and guessing takes time. That is why InPronunci trains the speech organs through Interactive Visual 2D Sound Simulators instead.
What are the key parts of your tongue and mouth for English?
Knowing the names of the parts lets you follow instructions, interpret feedback, and monitor your own articulation. Here is what you need to know.
Tongue parts and their roles
- Tip: The very front point. Contacts the alveolar ridge for /t/, /d/, /n/, /l/ and the upper teeth for /θ/, /ð/.
- Blade: The flat area just behind the tip. Used for /s/, /z/ and, in many speakers, for alveolar stops.
- Body/Dorsum: The large central and back mass. Rises toward the hard palate for /j/ and toward the velum for /k/, /g/, /ŋ/.
- Root: The back section attached to the hyoid bone. Affects pharyngeal resonance and overall tongue posture.
Oral landmarks you must locate
- Alveolar ridge: The bony bump just behind your upper front teeth. Run your tongue tip along it now — that is the target for /t/, /d/, /n/, /s/, /z/, /l/.
- Hard palate: The smooth, curved roof of your mouth behind the ridge. The dorsum approaches it for /j/ and high front vowels.
- Velum (soft palate): The soft, movable tissue at the back of the roof. The dorsum contacts it for /k/, /g/, /ŋ/.
- Upper molars: The back side teeth. The sides of your tongue should rest lightly against them during most speech — a posture called lateral tongue bracing.
Lateral bracing is the foundational postural setting for English. Ultrasound and electropalatography data show the tongue sides remain elevated and stable across the vast majority of running speech, providing a stable base from which the tip and dorsum can move quickly and precisely. Teaching yourself to maintain that lateral contact is not optional — it is the base setting everything else builds on.
| Tongue part | Primary function | Example sounds |
|---|---|---|
| Tip | Contact/constriction at alveolar ridge or teeth | /t/, /d/, /n/, /l/, /θ/, /ð/ |
| Blade | Groove or constriction just behind tip | /s/, /z/, /ʃ/, /ʒ/ |
| Dorsum (body) | Arching toward hard palate or velum | /j/, /k/, /g/, /ŋ/ |
| Root | Pharyngeal resonance, overall posture | Schwa /ə/, back vowels |
| Sides (lateral) | Bracing against upper molars | All running speech |
Practical cue: With a relaxed jaw, press your tongue sides gently against your upper back teeth. Hold that contact and say “see.” Notice how the tip is free to move while the sides stay anchored. That is the correct base posture. Never press hard; the contact should feel light and stable, not tense.
How do tongue height and backness define American English vowels?
Vowel identity in American English is primarily a function of two tongue dimensions: height (how close the tongue is to the roof of the mouth) and backness (how far forward or back the tongue’s highest point sits). Lip rounding and jaw opening contribute, but tongue position is the core variable.
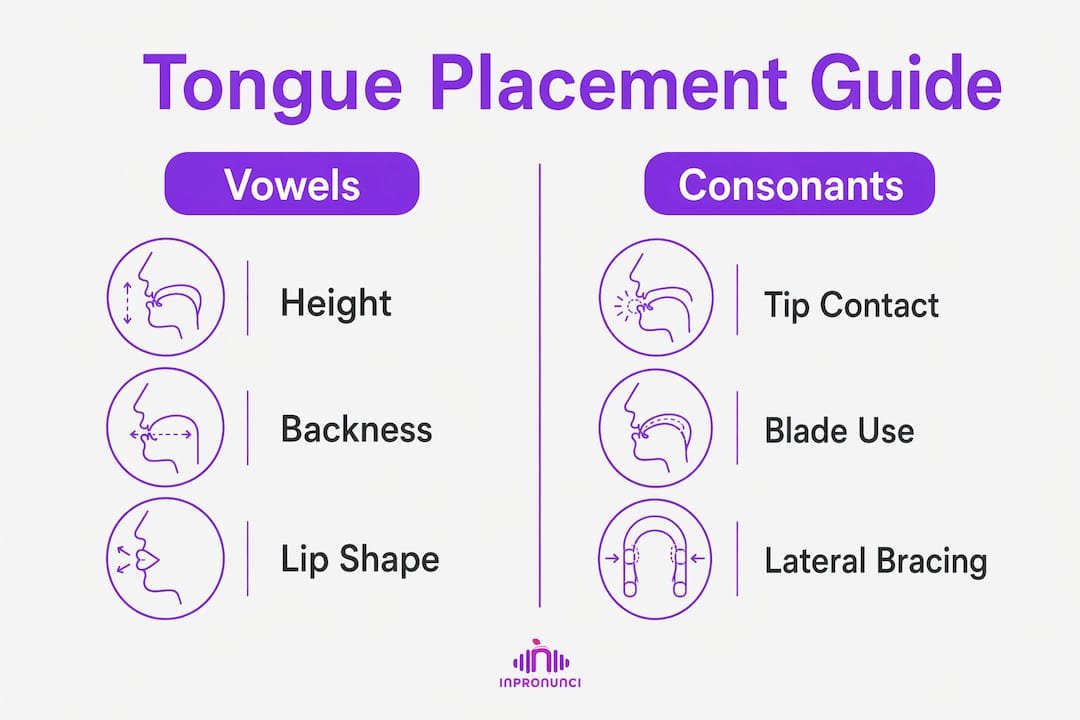
The table below maps eight key American English vowels to their tongue positions. Use it as a reference while you practice.
A table describes the targets, but it cannot train your tongue to reach them. In InPronunci, each of these vowels is trained through an Interactive Visual 2D Sound Simulator that guides tongue height, tongue backness, lip shape, and jaw opening step by step, so the vowel you develop is an American vowel, not a close approximation.
| Vowel | Example word | Tongue height | Tongue backness | Lip shape |
|---|---|---|---|---|
| /iː/ | beat | High | Front | Spread |
| /ɪ/ | bit | High-mid | Front-central | Slightly spread |
| /eɪ/ | bait | Mid (rising) | Front | Spread |
| /æ/ | bat | Low | Front | Neutral |
| /ɑː/ | calm | Low | Back | Neutral/open |
| /oʊ/ | boat | Mid (rising) | Back | Rounded |
| /uː/ | boot | High | Back | Rounded |
| /ʌ/ | strut | Mid-low | Central | Neutral |
Minimal pairs that reveal single-step tongue changes
The pair beat /iː/ and bit /ɪ/ differs by a small drop in tongue height and a slight retraction toward center. The pair bat /æ/ and calm /ɑː/ differs by a shift from low-front to low-back. Practicing these pairs slowly, with attention to where the tongue’s highest point is, trains the muscle memory you need for clear vowel contrasts. For a deeper set of drills, InPronunci’s American vowel practice guide walks through each vowel with audio and speech-organ training support.
Diphthong transitions
American diphthongs like /eɪ/, /aɪ/, and /oʊ/ require a smooth tongue trajectory, not two separate static positions. For /eɪ/, the tongue starts at a mid-front position and glides upward toward /ɪ/. For /oʊ/, it starts mid-back and glides toward a high-back position with increasing lip rounding. The movement between the two targets is what gives diphthongs their characteristic quality. Stopping at either endpoint and holding it produces a flat, non-native vowel.
Pro Tip: To check tongue height, open your jaw slightly and say a sustained /iː/. You should feel the front of your tongue arching close to the hard palate. Now say /ɑː/ and feel the tongue flatten and pull back. If both vowels feel the same, your tongue is not differentiating enough — slow down and exaggerate the arch.
How does tongue placement define English consonants?
Consonant identity depends on where the tongue contacts or narrows the vocal tract. This is called the place of articulation, and getting it right is what separates native-like consonants from approximations. The University of Sheffield’s articulatory phonetics overview and the Cambridge phonetics text both confirm that the active articulator — the tongue — moves toward a passive target to create each consonant category.
Places of articulation in American English
- Dental: Tongue tip contacts or approaches the upper front teeth. Sounds: /θ/ (think), /ð/ (this). Tactile cue: feel the tip touch the back edge of the upper teeth.
- Alveolar: Tip or blade contacts the alveolar ridge. Sounds: /t/, /d/, /n/, /l/, /s/, /z/. Tactile cue: feel the ridge bump just behind the upper teeth. This is the most common contact point in English consonant production.
- Postalveolar: Blade or front dorsum approaches the area just behind the alveolar ridge. Sounds: /ʃ/ (shoe), /ʒ/ (measure), /tʃ/ (church), /dʒ/ (judge). Tactile cue: the tongue body lifts and the blade pulls slightly back from the ridge.
- Palatal: Dorsum rises toward the hard palate. Sound: /j/ (yes). Tactile cue: feel the tongue body dome upward.
- Velar: Dorsum contacts the soft palate. Sounds: /k/, /g/, /ŋ/. Tactile cue: feel the back of the tongue press up and back.
- Retroflex (American /r/): Tip curls back (retroflex) or the tongue bunches in the mid-back area. Sound: /r/. Tactile cue: either curl the tip back without touching anything, or bunch the tongue body upward and back.
Tip vs. blade for alveolar sounds
Many learners use the blade for /t/ and /d/ when the tip produces a crisper, more native-like release. Articulatory setting research notes that tip contact at the alveolar ridge tends to yield a sharper burst for /t/ and /d/ than laminal (blade) contact. Practice saying “top” with the very tip of your tongue touching the ridge, then compare it with blade contact. The tip version usually sounds crisper. For advanced articulation work, this distinction is worth drilling explicitly.
Hand gestures and static diagrams usually approximate these contact points, which is why many learners produce a consonant that is close to the American one but not an exact copy. The Interactive Visual 2D Sound Simulators train the tongue tip, blade, and dorsum for the exact contact point and release of each American consonant, and the phonetic exercises that follow make that placement automatic.
How do you diagnose and fix tongue placement errors?
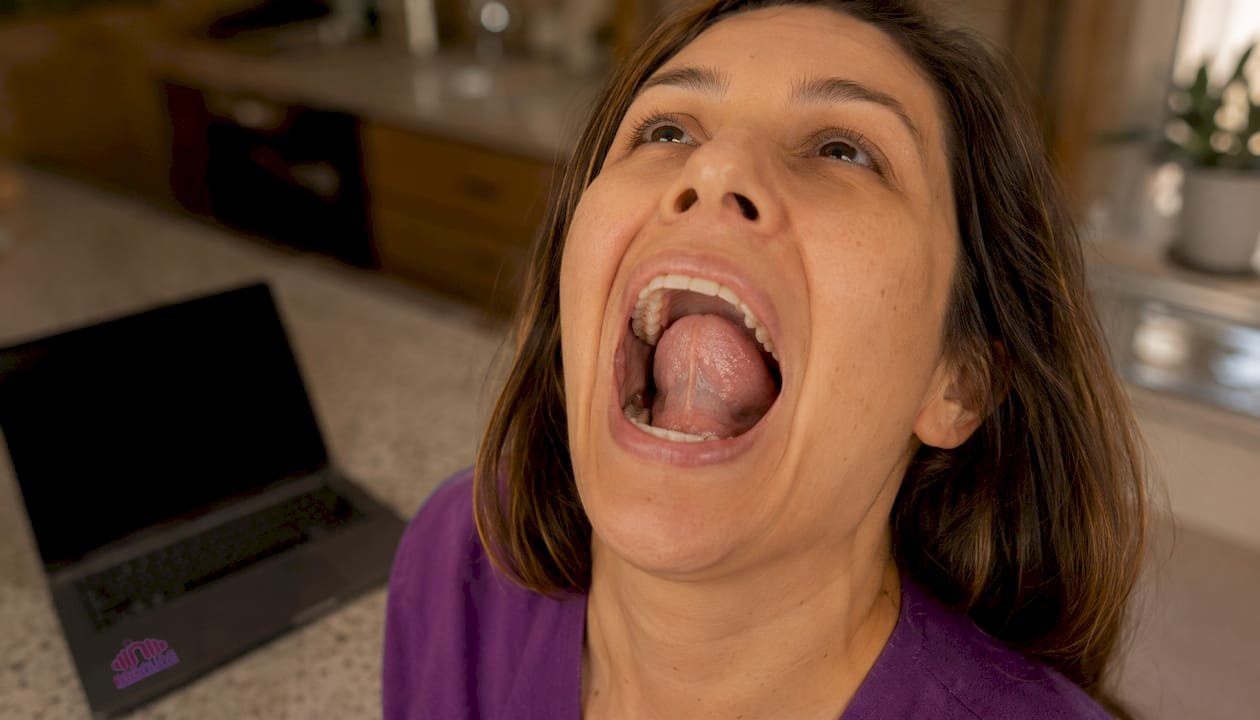
Most placement-related problems are identifiable by a small set of audible cues: a whistling or diffuse /s/, muffled vowels, flat diphthongs, or a non-native /r/. The tongue’s mobility means that small misplacements compound quickly in connected speech.
Interdental lisp (/s/ and /z/): The tongue tip protrudes too far forward, producing a /θ/-like sound instead of a clean sibilant. Correction: pull the tip back to just behind the alveolar ridge and groove the blade slightly to direct airflow.
Lateral lisp: Air escapes over the sides of the tongue instead of down the center. Cause: insufficient lateral bracing. Correction: press the tongue sides firmly against the upper molars before producing /s/ or /z/.
Muffled or centralized vowels: Vowels sound indistinct because the tongue is not reaching its target height or backness. Correction: slow down, exaggerate the tongue arch for high vowels, and consciously pull the tongue back for low-back vowels like /ɑː/.
Flat diphthongs: The tongue starts correctly but does not complete the glide. Correction: practice the full trajectory in slow motion, then gradually speed up.
Non-native /r/: The tongue tip stays flat or contacts the alveolar ridge (producing a tap or trill). Correction: either curl the tip back without touching anything, or try the bunched /r/ by raising the tongue body mid-back.
Lateral tongue bracing is the most overlooked foundational setting in accent training. When the sides of your tongue lose contact with the upper molars, the entire articulatory base becomes unstable. Vowels lose resonance, sibilants lose focus, and rapid consonant sequences blur together. Before diagnosing any individual sound problem, check your lateral bracing first — it is the base that everything else depends on.
Diagnostic checklist:
- Say “see” slowly. Does the /s/ whistle cleanly, or does it sound diffuse or lispy?
- Say “beat” and “bat.” Do they sound clearly different, or do they merge?
- Say “calm.” Does the vowel feel low and back, or does it sound like a centralized /æ/?
- Say “red.” Does the /r/ sound American, or does it sound like a tap or a trill?
- Say “go” and “no.” Do /g/ and /n/ feel like they contact the same back area of the palate?
If you notice persistent distortion on /s/ or /z/ that does not respond to placement cues, or if you have a structural concern like limited tongue mobility, consulting a speech-language pathologist is the right step.
For accent-related placement errors, the fastest fix is to retrain the sound itself rather than keep repeating it: the Interactive Visual 2D Sound Simulators guide the correct articulation, and the AI Accent Coach confirms as you speak whether the error is gone.
Step-by-step drills to change your tongue placement
Systematic repetition with focused sensory cues, followed by a gradual speed increase, is the most reliable route to permanent placement change. The sequence below moves from isolated sounds to connected speech, which is how motor learning actually works.
Inside InPronunci, this progression follows the four connected training stages of the course: (1) American sound articulation training with 2D Sound Motion Technology and Interactive Visual 2D Sound Simulators, (2) phonetic exercises that make each vowel and consonant fluent, habitual, and automatic, (3) sentence practice for rhythm, stress, intonation, melody, and connected speech, and (4) paragraph practice for spontaneous speech, public speaking, and real communication. The AI Accent Coach evaluates your speech at every stage.
- Isolation (Days 1–2): Produce a single target sound in silence, holding the tongue position for 3–5 seconds. Feel the contact point. For /t/, touch the tip to the alveolar ridge and hold before releasing. For /iː/, arch the tongue high and forward and hold. Repeat 10 times per sound.
- Controlled syllables (Days 2–3): Add a vowel: /tiː/, /tɑː/, /tuː/. Keep the tip contact precise on each /t/. For vowels, drill the four anchor positions: high-front /iː/, high-back /uː/, low-front /æ/, low-back /ɑː/.
- Minimal pairs (Days 3–4): Practice pairs that contrast one placement feature. Vowel pairs: beat/bit, bat/calm, boot/book. Consonant pairs: tin/thin, den/then, cap/gap. Say each pair three times slowly, then three times at normal speed.
- Carrier phrases (Day 4): Embed the target sound in a short fixed frame: “I said ___ again.” This keeps your attention on the target sound while adding minimal connected-speech demands.
- Sentences (Days 5–6): Use sentences with multiple instances of the target: “The team beat the heat in the street.” Monitor placement on each target sound without slowing the whole sentence.
- Connected speech (Day 7+): Read a paragraph aloud, then record and review. Check whether placement holds under natural speech rate. Daily pronunciation practice at this level is what converts conscious placement into automatic habit.
Weekly schedule template:
- Minutes per session: 15
- Structure: 5 minutes warm-up (lateral bracing check + anchor vowel drill) + 10 minutes focused drill on the day’s target
- Measurable goal: Achieve clean, consistent placement on 8 out of 10 repetitions before moving to the next step
Minimal pair sets for diphthong practice: bay/buy/boy, go/glow/grow. For each pair, trace the tongue trajectory from start to end position in slow motion before adding speed.
Pro Tip: After 4–6 weeks of focused placement work, begin fading conscious attention to position. Set a goal of speaking one full sentence without monitoring placement, then two, then a paragraph. The goal is accuracy without effort — that is when placement has become automatic.
How InPronunci helps you train tongue placement faster
Combining 2D speech-organ simulators and real-time feedback accelerates the mapping of tongue movements to target sounds more than unaided practice alone. Learners who rely only on audio cannot tell what their tongue is actually doing, so they keep guessing. The comparison below shows the difference.
InPronunci + MyAccentWay Method
Interactive Visual 2D Sound Simulators
Built on 2D Sound Motion Technology, developed by Prof. Alex for MyAccentWay. Students train their speech organs actively: tongue, lips, jaw, teeth, airflow, and voice follow the simulation into the correct position for every American sound.
Result: students develop American articulation with full articulation details, practically and accurately, instead of guessing.
- Students interact with the Interactive Visual 2D Sound Simulator and train how each American sound is made, step by step.
- The simulator trains the hidden movement of the tongue, lips, jaw, teeth, airflow, and voice with full articulation details.
- Pronunci Instructions guide every sound step by step with voice instructions, like an accent coach in class.
- The method trains the speech movement behind the sound, not only the sound students hear.
- Students practice coordinating the tongue, lips, jaw, and airflow for clear American English pronunciation.
- Students follow a clear, repeatable sound simulator designed for adult non-native English speakers.
- Training moves each sound into phonetic exercises, sentences, paragraphs, and real speech.
- The AI Accent Coach evaluates pronunciation as students speak, so errors are corrected right away.
- InPronunci uses a structured American accent training course that improves listening and speaking fluency.
Training Result:
Students develop American-like sounds faster and more accurately, and train them until they become fluent, habitual, and automatic in real communication.
Traditional Pronunciation Training
Traditional Sound Explanation
A coach explains where the tongue should go or asks the student to repeat a sound. This can help, but many students stay passive, because the articulation movement happens inside the mouth and they cannot tell what to change.

Limit: hand gestures and static mouth pictures do not reveal full articulation details, so students keep repeating the same errors.
- ✕Students listen and repeat.
- ✕Students may get a still mouth picture or a hand gesture.
- ✕The teacher gives a general explanation.
- ✕The main method is imitation.
- ✕Students may not understand what the speech organs are doing.
- ✕Students often guess until it sounds better.
- ✕Practice may improve one word or one sound.
- ✕Students repeat passively.
- ✕Exercises may feel random or generic, with all sounds in one text.
Training Result:
Sounds take longer to develop and often stay approximations, close to American English but not an exact copy.
InPronunci combines three integrated tools:
- Interactive Visual 2D Sound Simulators: These interactive simulators train how native speakers produce each American sound, including tongue position, lip shape, jaw movement, teeth, airflow, and voice. Learn more about 2D Sound Motion Technology on MyAccentWay.
- AI Accent Coach: As you speak, the AI Accent Coach scores your pronunciation, intonation, rhythm, and connected speech in real time. It flags placement-related errors immediately so you can correct them in the same session rather than reinforcing a mistake across dozens of repetitions. Learn more about AI-powered pronunciation feedback.
- Pronunci Instructions: These step-by-step cues replicate working with a real accent coach. They tell you exactly what to do with your tongue, lips, and jaw at each stage of a drill — so you are never guessing.
InPronunci training structure
How InPronunci trains the American speech system
InPronunci trains the full American speech system: Interactive Visual 2D Sound Simulators and phonetic exercises for articulation and American sound development, sentence practice for intonation, melody, rhythm, and connected speech, paragraph practice for spontaneous speech, public speaking, and real communication confidence, and Advanced AI Accent Coach evaluation as you speak.
InPronunci is an advanced, linguistically structured American accent training platform with more than 1,000 downloads and a growing learner base. It is designed for serious ESL learners who want American pronunciation, stronger intonation, more natural rhythm, better connected speech, and the ability to speak English more confidently in real communication. The program is especially useful for intermediate and advanced English speakers who want to become independent speakers of English with confident communication, stronger speaking control, long-term speech improvement, and great public speaking skills. It is also designed for advanced speakers whose goal is to speak like a native or closer to native-like American speech, including people who were raised in the United States but still have slight accent patterns from the native language they were born with. It is a complete American accent training course and system created by Prof. Alex, Ph.D. Accent Coach, Doctor of Education, and professional linguist based in Austin, Texas, with Pronunci Instructions from Prof. Alex for each lesson that make self-learning more effective, supported, and clear.
A sample 7-day workflow with InPronunci
| Day | Activity | InPronunci feature used |
|---|---|---|
| Day 1 | Tongue anatomy + oral landmark identification | Free Chapter 1: “Get to Know Your Speech Organs” |
| Day 2 | Vowel isolation: /iː/, /æ/, /ɑː/, /uː/ | Interactive Visual 2D Sound Simulators + Pronunci Instructions |
| Day 3 | Consonant isolation: /t/, /d/, /s/, /k/ | Interactive Visual 2D Sound Simulators + AI Accent Coach feedback |
| Day 4 | Minimal pairs: vowels and consonants | AI Accent Coach real-time scoring |
| Day 5 | Carrier phrases + coach micro-instructions | Pronunci Instructions + progress tracking |
| Day 6 | Sentence-level integration | AI Accent Coach + recording comparison |
| Day 7 | Connected speech review + score check | Full evaluation mode + coach notes |
Free Chapter 1 is available at no cost at learn.inpronunci.com/sign-up. It covers speech-organ positioning and gives you the foundation to follow every subsequent instruction with confidence. If you want personalized guidance from the start, you can book a free Premium session with Prof. Alex, Ph.D. Accent Coach
Quick self-check: use this before and after every practice session
Keep this checklist visible during practice and refer to it briefly before any high-stakes speaking situation (a meeting, a call, a presentation).
- Posture: Sit or stand upright. A dropped chin compresses the vocal tract and affects tongue position.
- Lateral bracing: Press your tongue sides lightly against your upper molars. Hold that contact as your baseline.
- Tongue height/backness: For your target vowel, confirm the tongue’s highest point is in the right zone (front for /iː/, back for /ɑː/).
- Jaw relaxation: Your jaw should be loose, not clenched. Tension in the jaw restricts tongue movement.
- Listening prompt: Say your target word or sentence, then ask: does it sound like the native model, or is something flat, muffled, or distorted?
Three daily metrics to record:
- Subjective clarity score (1–5) for your target sound after the session.
- Number of items practiced (sounds, minimal pairs, sentences).
- Total minutes of focused practice.
Tracking these three numbers over two weeks gives you a clear picture of whether your placement is improving and where to focus next. For learners combining pronunciation with broader language skills, ELA writing and language guides can complement your spoken practice.
Tongue placement, specifically height, backness, lateral bracing, and tip-or-blade contact, is the primary physical variable controlling both vowel quality and consonant identity in American English.
Why tongue placement is a dynamic skill, not a fixed target
Most intermediate learners approach tongue placement as a series of static positions to memorize. That framing is understandable, but it misses the most important point: what produces consistent, natural-sounding American English is an articulatory setting, a resting posture and active habit that the tongue maintains across all sounds and transitions. Isolated sound drills are necessary, but they are only the starting point.
The evolution of human tongue biomechanics gave us a uniquely mobile articulator capable of the fine-grained gestures that vowels and velar plosives require. That mobility is an asset, but only when it is organized around a stable base. Lateral bracing provides that base. Without it, even a learner who has memorized every IPA position will produce speech that sounds effortful or blurred at natural speed.
The practical implication is this: train placement as a habit, not a checklist. Use the drills in this article to build the sensory map, use InPronunci’s simulators and AI feedback to verify it, and then practice fading conscious attention until the placement runs on its own. That transition, from deliberate to automatic, is where real accent change happens. Free Chapter 1 in InPronunci gives you the speech-organ foundation to start that process correctly. The Basic Plan supports self-study at your own pace; the Premium Plan adds monthly 1-on-1 sessions with Prof. Alex, Ph.D. Accent Coach for learners who want direct, personalized guidance.
InPronunci gives you a clear path from placement to fluency
If you have read this far, you understand what needs to change. The gap between knowing where your tongue should go and actually getting it there automatically is a training problem, and InPronunci is built to close that gap faster than unaided practice.
The Interactive Visual 2D Sound Simulators train the tongue shape, lip position, and jaw movement for every American sound, so you are not guessing at a hidden target. The AI Accent Coach scores your pronunciation as you speak and flags errors immediately. Pronunci Instructions walk you through each drill the way a real coach would, step by step. The result is a structured, step-by-step training path from individual sounds to real speaking situations.
This is the difference between InPronunci and traditional methods. Instead of traditional hand gestures that leave students guessing, 2D Sound Motion Technology first develops accurate American sounds, and then InPronunci trains those sounds step by step: phonetic exercises, sentence practice with intonation, and paragraph practice for real communication, with the AI Accent Coach evaluating every stage.
Start with Free Chapter 1: “Get to Know Your Speech Organs” at no cost. Move to the Basic Plan for full self-study access guided by the AI Accent Coach and Pronunci Instructions. Choose the Premium Plan for monthly 1-on-1 sessions with Prof. Alex, Ph.D. Accent Coach See what learners like Andrew, Thiago, and Tian achieved with this approach. InPronunci is available on iOS and Android, serving learners from 50+ countries. Sign up and start Free Chapter 1, or book a free Premium session to speak directly with Prof. Alex, Ph.D. Accent Coach
Useful sources
| Source | Type | Why consult it |
|---|---|---|
| Phonetics: Vowels, Articulation, Acoustics — Britannica | Reference article | Authoritative overview of vowel height, backness, and lip rounding as the core dimensions of vowel classification |
| Lateral Tongue Bracing as a Universal Postural Basis for Speech — Cambridge/JIPA | Peer-reviewed study | Ultrasound and EPG evidence for lateral bracing as a pervasive postural setting across languages |
| Evolution of the Human Tongue and Emergence of Speech Biomechanics — Frontiers in Psychology | Research article | Comparative anatomy and biomechanics explaining why the human tongue can produce the fine gestures English requires |
| In Brief: How Does the Tongue Work? — NCBI/InformedHealth | Medical reference | Biological grounding for tongue mobility and the link between imprecise placement and speech errors |
| Articulatory Phonetics — University of Sheffield | University resource | Clear explanations of active vs. passive articulators and place-of-articulation categories with English examples |
| Consonants — A Short Introduction to English Pronunciation (OpenText KU) | Open textbook | Practical pedagogy for consonant place of articulation with exercises targeting specific contact points |
| The Production of Speech Sounds — Cambridge University Press | Textbook excerpt | Classic phonetics text covering tongue parts, vowel diagrams, and place-of-articulation descriptions |
| Messum (2010): Understanding and Teaching the English Articulatory Setting | Pedagogical paper | Practical guidance on articulatory setting, tip vs. blade use, and lateral contact for natural English speech |
| Mastering Clarity: 2D Sound Video Mouth Training Simulators — InPronunci | Practice resource | Evidence and explanation for why speech-organ training accelerates articulatory mapping compared to audio-only practice |
| Free Chapter 1: Get to Know Your Speech Organs — InPronunci | Practice resource | Free onboarding module covering speech-organ positioning — the recommended starting point for all learners |
Questions & Answers
FAQ
01Why is tongue placement important for English pronunciation?
Tongue placement determines both vowel quality and consonant identity. A small shift in tongue height or backness changes one vowel into another, and a misplaced contact point turns one consonant into a different sound entirely.
02Where should your tongue be when speaking American English?
For most American English sounds, the tongue sides rest lightly against the upper molars (lateral bracing), the tip stays near the alveolar ridge for alveolar consonants, and the dorsum arches toward the hard palate or velum for back consonants and high vowels.
03How does tongue position affect vowel sounds?
Vowel quality is primarily determined by two dimensions: how high the tongue arches (height) and how far forward or back the highest point sits (backness). Raising the tongue high and forward produces /iː/ as in beat; lowering it and pulling it back produces /ɑː/ as in calm.
04Does tongue placement affect speech clarity?
Yes. Imprecise placement is a leading cause of lisps, muffled vowels, and non-native consonant quality. Anchoring the tongue sides (lateral bracing) and reaching precise contact points for alveolar and velar consonants directly improves intelligibility.
05Are hand gestures and mouth pictures enough to learn American sounds?
Usually not. Hand gestures and static mouth pictures cannot reveal full articulation details, so students take longer to develop each sound and often produce an approximation instead of an exact American English sound. 2D Sound Motion Technology solves this by training the speech organs, including the tongue, lips, jaw, teeth, airflow, and voice, through Interactive Visual 2D Sound Simulators.
06How can InPronunci help with tongue placement training?
InPronunci's Interactive Visual 2D Sound Simulators train tongue position for every American sound, so students develop American-like sounds. The structured course then trains those sounds through phonetic exercises, sentence practice, and paragraph practice, and the AI Accent Coach scores your pronunciation in real time as you speak. Free Chapter 1, “Get to Know Your Speech Organs,” is the recommended starting point and is available at no cost.
Recommended

Mouth Training for Sounds: What It Is and How Inpronunci Uses It
Discover what mouth training for sounds is and how Inpronunci uses it to enhance speech clarity and pronunciation accuracy for learners.
American English Voiced vs Voiceless Sounds | Inpronunci
Discover the differences in american english voiced vs voiceless sounds. Mastering these helps you speak clearly and confidently in American English.

Pronunciation Challenges Asian English Speakers Face | Inpronunci
Why Mandarin, Korean, Japanese, and Vietnamese speakers struggle with American sounds like R/L, TH, and V/W, and how to train them sound by sound.
Plans
What InPronunci costs
InPronunci Basic
$35 per month
Chapter 1 is free after signup.
InPronunci Premium
$200 per month
Includes a coach: